
Step 1 – Configuring the Vendor Options for OneApp Guarantee
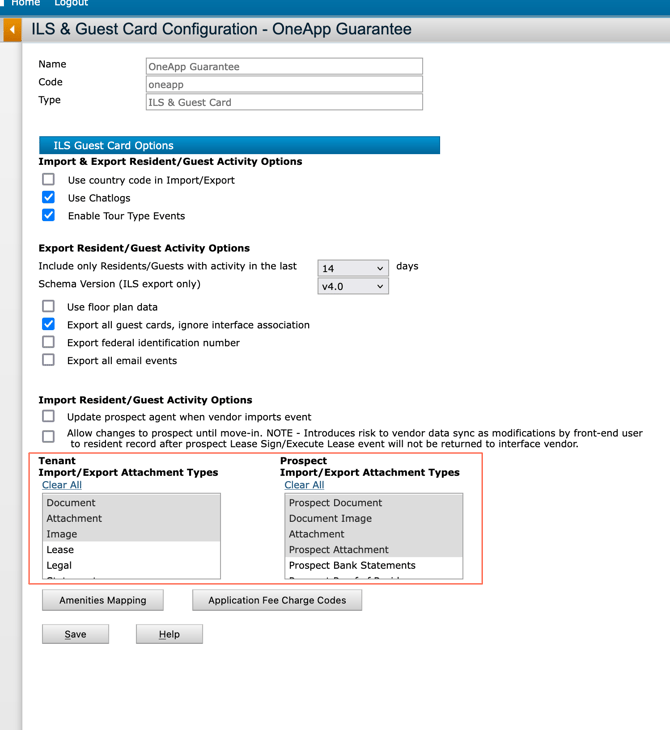
Menu Path: Basic iData Menu > Interfaces > Configuration > Review Interface Vendors > Interface Configuration
- Confirm the vendor name appears in Voyager under ILS Guest Card. If the vendor is not present, contact Yardi Technical Support to load the vendor package.
- Select OneApp Guarantee
- Select the options desired on the vendor configuration screen. These options are based on client preferences and vendor requirements. The available options vary depending on the interface type.
- Save the configuration options.
Step 2 – Configure the Property or Property List
Menu Path for a Single Property: Setup > Property > Find Property > [property code] > Submit.
- Click on the Functions drop down menu. Click on Interface Configuration.
- Click the appropriate Interface type under Interface Configuration (i.e. ILS Guest Card)
- Highlight OneApp Guarantee under Available Agencies. Click Select and Save.
Menu Path for a Property List: Interfaces > Configuration > Bulk Property Configuration.
- Enter property list code
- Select Interface Type from drop down.
- Select Configure.
- Highlight OneApp Guarantee from the list of Available Agencies and click Save.
Step 3 – Configure the Interface User
Menu Path: System Administration >Security > Add User
- Create a new interface user and link to a security group for the specific Interface Type. The security group should have Read or Read/Write access for appropriate web services permission(s)
(e.g.) Interfaces: Web Service – ILS Guest Card
Interfaces: Web Service – Common Data
- Enter the property code or property list code in the property field to allow interface user access to properties configured for OneApp Guarantee.
- Click on the Privileges tab and Select “Interface User”. This will give users access through the web services, but not the Voyager front end.
- Click Save.
Mutual Clients should enter a case in the Yardi Client Central if assistance is needed with any Step in this document.
Step 4 – Provide Access Information to OneApp Guarantee
- Voyager URL (vendor will append the appropriate web services endpoint)
- Interface username and password
- Database Name
- Server Name (will always be the same as Database Name)
- Names and Yardi Property IDs for any properties where the integration should be enabled
Clients should always notify the third-party vendor of any changes to Voyager URL, database server, or database name.